In the long and storied history of jewelry design, artisans have relied on their hands and traditional tools to transform precious metals and gems into works of art. Today, a silent digital revolution is fundamentally changing how this ancient industry creates. The advent of resin 3D printing has opened a new door for jewellers, a gateway to unbounded creative possibilities.
Far from diminishing the value of handcraft, this technology liberates designers from tedious physical constraints, allowing them to focus on creating more imaginative and intricate pieces. Whether you are an independent jewelry designer, a craft enthusiast, or a beginner hoping to bring a unique vision to life, this guide will lead you through the process of using a resin 3D printer to transform your digital designs into exquisite, tangible jewelry.
The Jeweller’s Choice: Why Resin Reigns Supreme
When it comes to crafting jewelry, precision and surface finish are paramount. In this arena, resin 3D printing holds an incomparable advantage. Unlike traditional FDM printers that use molten plastic filament, resin printing cures liquid photopolymer layer by layer with UV light. This enables an incredible level of detail—whether it’s hair-thin filigree, complex openwork patterns, or subtle, flowing curvatures, every nuance is flawlessly rendered.
This level of precision makes resin printing the perfect partner for lost-wax casting. Designers can print a high-fidelity model using a castable wax resin, which can then be used in the traditional casting process to create a final piece in precious metal. Furthermore, a growing number of direct-wear 3D printing resins are now available, materials that can be post-processed to achieve an amber-like transparency or a ceramic-like texture, providing an entirely new medium for contemporary fashion jewelry.
Step-by-Step Workflow From Pixel to Pendant
Creating successful 3D printed jewelry requires a systematic process where every step is vital.
1. Design and Modelling
Everything begins with a digital concept. Using professional software like Rhino 3D, ZBrush, or Blender, you can create complex geometric forms that would be difficult, if not impossible, to achieve by hand. For jewelry, you must pay special attention to wall thickness, support strategy, and dimensional accuracy to ensure the piece is not only printable but also comfortable and durable enough to be worn.
2. Print Preparation: The Art of the Support
After importing your model into a slicing software (like Chitubox or Lychee Slicer), the meticulous placement of supports is key to a successful print. Too few supports, and the model may collapse during printing; too many, and you are left with unsightly marks that are difficult to remove. For delicate rings or pendants, you must patiently fine-tune the contact area and density of each support point.
3. Printing and Post-Processing: The Heart of the Craft
A finished print is only half the battle. The subsequent post-processing steps are what determine the final quality of your work.
From ‘Green’ Part to Gem: Washing and Curing
A model fresh from the build plate is coated in a layer of uncured resin. It must be thoroughly washed using high-concentration Isopropyl Alcohol (IPA) or a dedicated cleaning solution in an ultrasonic cleaner or a wash station. For a ring with fine openwork, an ultrasonic cleaner is particularly effective at dislodging trapped resin from crevices. After washing, the model requires a final cure in a UV curing station to achieve stable material properties. Under-curing can result in a tacky, fragile piece, while over-curing can make the material brittle.
Casting or Direct Finishing
If you are pursuing the lost-wax casting route, your printed model (made from a specialized castable resin) will be encased in investment plaster. When heated, the resin burns away cleanly, leaving a cavity for molten metal to be poured into. If you are using a direct-wear resin, post-processing will involve careful sanding, polishing, and perhaps lacquering to achieve the desired lustre and feel.
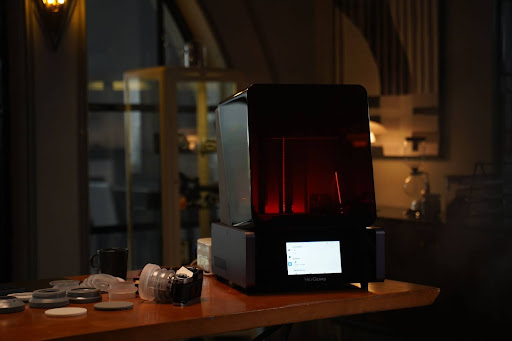
In the realm of rapid prototyping, certain equipment can streamline this process. High-precision resin printers from brands like HeyGears Reflex 3D printer, for example, often feature an integrated workflow that simplifies the journey from print to wash. For a jewelry designer who needs to quickly iterate on designs and verify the structure and wearability, this can significantly boost the efficiency and reliability of prototyping.
The Alchemist’s Table: Choosing Your Material
Your choice of 3D printer printing material should be dictated by the final purpose of your piece:
- Castable Wax Resin: Optimized for lost-wax casting with a clean, low-ash burnout. This is the top choice for creating metal jewelry.
- High-Toughness Resin: Suitable for functional jewelry components or pieces that require a degree of flexibility.
- ABS-Like Resin: Possesses high strength and is well-suited for larger pieces of “statement” jewelry.
- Clear/Translucent Resin: With careful sanding and polishing, this can produce mesmerizing effects that mimic crystal or amber.
Conclusion
Resin 3D printing brings more than just efficiency to jewelry creation; it brings a profound democratization of the craft. It dramatically lowers the barrier to entry for creating custom and complex designs, allowing independent designers and small studios to compete with major brands on the pure merit of their creativity.
Mastering this technology means you can transform your most boundless ideas—whether they are organic forms drawn from nature or futuristic geometric structures—into unique, wearable works of art. It is time to pick up the digital graver’s tool of our age and begin crafting your own legend in jewelry.


